How to Manually Install or Reinstall PostgreSQL 9.3 (Windows)

PokerTracker 4 version 4.11.x +
August 16, 2021
  • Overview

    This guide will help you to manually install PostgreSQL 9.3.  PokerTracker's developers and support team recommend PostgreSQL 9.3, although there are no signifigant performance improvements if you already have PostgreSQL 9.0 or higher.  You use PostgreSQL 9.3 at your discretion as of PokerTracker 4.11 provided that you manually install PostgreSQL 9.3 and migrate your databases to this new server version. 

    If PostgreSQL was previously installed on this computer then it is imperative for you to know which major version was installed, for example PostgreSQL 8.4.x or 9.0.x. You can determine this via several methods:

    1. If PostgreSQL is still installed on your computer, go Start -> Programs and look for PostgreSQL (version) to determine the release version of PostgreSQL installed on your computer.
    2. If PostgreSQL is no longer installed on your computer, open My Computer and browse to your Program Files/PostgreSQL directory. There will be a sub-directory listed which is either 8.x or 9.x depending on the version installed.
    • Always Backup Before You Proceed

      PokerTracker 4 makes it very easy to backup and restore your database and its associated settings.  It is recommended to backup your data regularly, especially before making major changes to your database or system. Before you make any modifications to PostgreSQL it is very important to backup your database, this is the most important rule that should always be followed before proceeding with this guide.

  • How to Fix a Database or Server Problem

    All Database and PostgreSQL problems can be classified into two categories:

    1. Service Issues - Uninstalling and then reinstalling PostgreSQL will typically resolve all service issues, but reinstallng PostgreSQL cannot resolve problems caused by a corrupted database or database files.
    2. Database Issues - Database issues are easiest to solve by creating a new database and re-importing your archived hand histories from the Processed Files Folder.  This is the most efficent way to rebuild your database.  

    Postgres Service issue occurs when the database server cannot be started by Windows, or if the installation folder becomes corrupted. Service issues are very rare.  

    A PostgreSQL Database issue can occur if the database becomes corrupted.  Although database corruption is rare, it is typically caused by hard drive failure or by powering a computer down in the middle of a database function. We do not recommend closing your laptop in the middle of importing or performing database housekeeping functions; shutting down PokerTracker before you put your computer to sleep or power it off will help prevent database problems from occurring.

  • Managing the Postgres Service
    • Postgres Service Overview

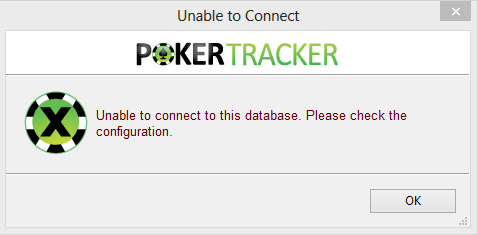
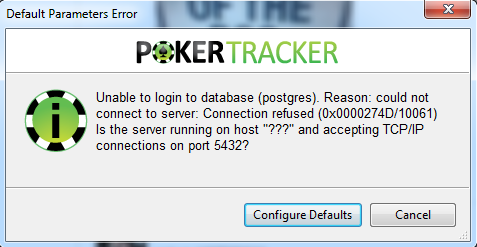
      If PokerTracker cannot communicate with the PostgreSQL database there are three primary causes for this issue:

      • A Firewall may be interfering with the Port used by PostgreSQL to communicate via TCP/IP.  Please refer to the PokerTracker Anti-Virus, Firewall, and Security Software Configuration Guide for information how to solve this problem.  
      • A PostgreSQL lock may have occurred, this is a protection mechanism that might happen if you shutdown your computer while a PostgreSQL database write is occurring.  This rare issue can be solved by deleting the postmaster.pid file and then restarting your computer.  The postmaster.pid file is typicly located in the directory  C:\Program Files\PostgreSQL\9.3\data\
      • The Postgres service is not running.  This chapter in the guide will help you to determine if this is the cause. 

      Unable to Connect to Postgresql

      Unable to Login to PostgreSQL

       
    • Confirm that the Postgres Service is Running

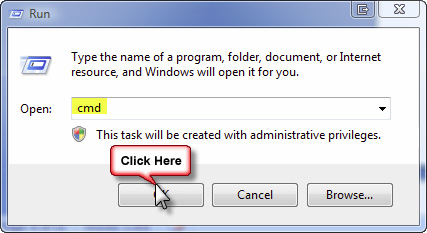
      The fastest way to confirm if the PostgreSQL service is running is by using the Windows Command Lind interface. Open a Command Line from the Windows Start menu by pressing Start, select Run, type "CMD" and click Enter. In the Command Line window that opens type net start | find "Postgre" and press Enter. The window should now display all services that are running which contain the word Postgre.  If nothing is returned this means that the PostgreSQL service is not running.  
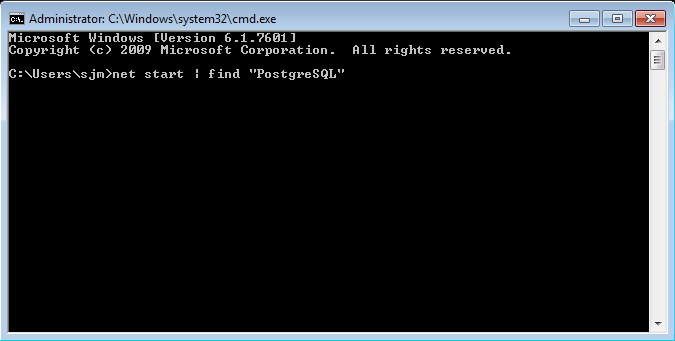
      Windows Command Line


      You can also confirm whether or not PostgreSQL is running by opening Windows Task Manager.  Open Windows Task Manager by right-clicking the taskbar, and then clicking Start Task Manager. The keyboard shortcut to open the Task Manager is Ctrl+Shift+Esc.

      Windows 8 : Select the Processes tab in Task Manager, then click More Details.
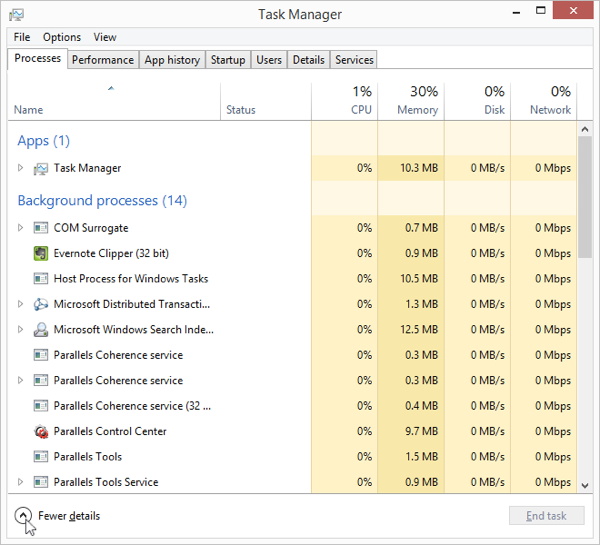
      Windows 8 Task Manager


      Windows Vista & Windows 7: Select the Processes tab Windows Task Manager, then click the Show processes from all users button.
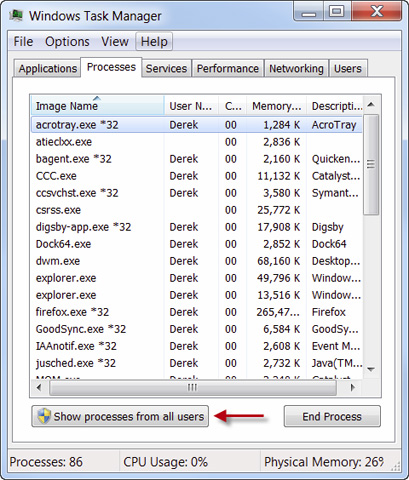
       

      Windows XP and Windows 2000Under the Processes tab, at the very bottom, make sure that "Show processes from all users" is checked.

      Sort the list of running processes alphabetically. Scroll down the list, you should find several processes named postgres.exe. If you installed the 32Bit version of PostgreSQL then you should see *32 after each instance of the PostgreSQL in the list.  If you installed the 64Bit version of PostgreSQL then you should see *64 after each instance of the PostgreSQL in the list.  

      If you can find the processes named postgres.exe then PostgreSQL is installed properly and you can proceed to run PokerTracker 4.
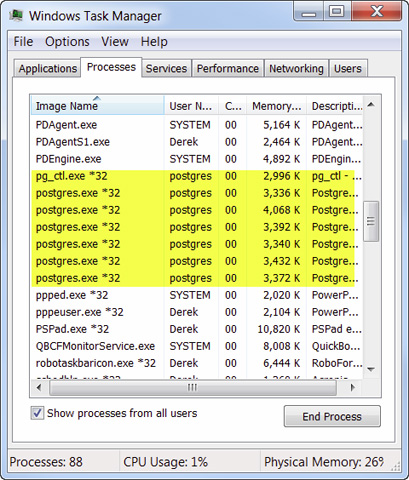
       

      If you do not see PostgreSQL in the list and installation completed without any errors then you must follow these instructions to start the PostgreSQL service:

      1. Click Start
      2. Type services.msc and click Enter. This will open the Services Control Panel. 
        1. Windows XP users will need to click Run, followed by services.msc and then click Enter
        2. Windows 7 users can access the Service list within the Task Manager by selecting the Service tab. 
      3. ​Click the Name heading to sort all of the services by name
      4. Find the service whose name starts with PostgrSQL and select it. Notice that the Log On As column for this service should  contain .\postgres, this is the user account that is used by the postgreSQL server to operate. 
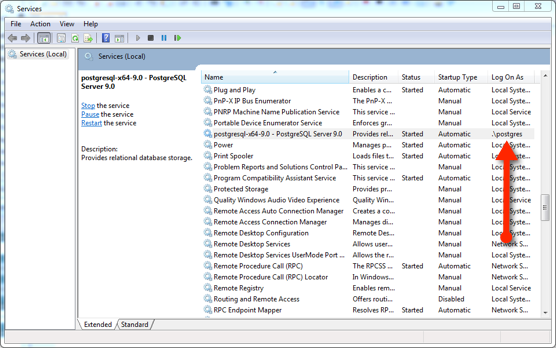
        postgreSQL Server Service
         
      5. Click the Restart Service button. 

      Restart PostgreSQL

      PostgreSQL should now start and be listed in your Windows Task Manager. If PostgreSQL does not run, please contact PokerTracker support for personalised assistance.

  • Manually Installing PostgreSQL 9.3

    Each major version upgrade of PostrgeSQL creates a new installation folder with a dedicated server and data folder.  This means a data backup and restore is necessary when converting to a new PostgreSQL major version. It is possible to have two or more PostgreSQL servers running at the same time, provided they are different major versions. 

    You cannot directly upgrade to PostgreSQL 9.3 from PostgreSQL 8.3, 8.4, 9.0, 9.1, or 9.2.  Since you cannot directly upgrade you have one of two options if you wish to install PostgreSQL 9.3 and you already have a previous version of PostgreSQL installed:

    1. Backup your existing databases, uninstall PostgreSQL, then install PostgreSQL 9.3 and restore your databases
    2. Install a new instance of PostgreSQL 9.3 using a new dedicated Port. Back up your old database(s).  Then click File > Open User Data Folder and close PT4.  In the window that opened go to the Configure folder, then edit the PokerTracker.cfg file in a text editor. Search for the text that says [Database] and change the text below to match the port of the new PostgreSQL 9.3 server which is typically 5433 if you are using the default settings
           [Database]
           Default.Postgres.Server=localhost
           Default.Postgres.Port=5433
    3. Now you can run PT4 again and restore the old database(s) to this newly created PostgreSQL 9.3 database server that uses the new Port.
    • Download the Installer from PostgreSQL.org

      When installing PostgreSQL for PokerTracker 4, always download and install the latest update of the version you wish to install for the best performance and to make sure you have the latest fixes installed.  PostgreSQL 9.3 is supported in PokerTracker 4 as of version 4.11 which was released May 2014. 

      Open a web browser and go to the postgresql.org download pageYou may choose between the 32Bit or 64Bit installer versions of PostgreSQL 9.3.  

      If you have the 64Bit OS installed such as Windows 7-64, then PokerTracker recommends that you download the Win x86-64 64Bit PostgreSQL installer.  If you have have a classic 32Bit version of the Windows OS installed, then PokerTracker recommends that you download the Win x86-32 version which is the classic 32Bit PostgreSQL installer.

      Generally speaking, PokerTracker 4 users that have a 64Bit operating system and the 64Bit version of PostgreSQL installed will see a performance boost provided that adequate amounts of RAM are available for the database server.  Typically speaking 8 Gigs of RAM or more are required to see this performance boost. 

      postgresql.org

    • PostgreSQL Setup Wizard

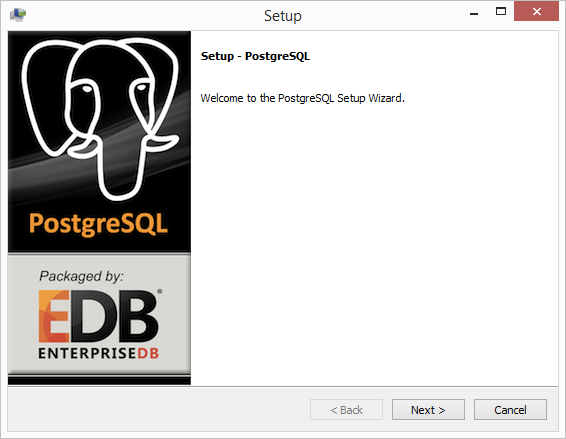
      Double-click the postgresql-9.3.x installer file file that was downloaded to your computer to begin the installation process, then click the Next button to proceed.

      PostgreSQL Setup Wizard

    • Installation Directory

      The second screen named Installation Options is the step where you can choose the location of PostgreSQL 9.3 on your hard drive. If you need to install PostgreSQL to a non-default location, such as a different hard drive, then click folder icon and browse to and select the location to install. If you previously had an earlier version of PostgreSQL such as 9.0 or 8.4 then a new folder will be required, you cannot install PostgreSQL 9.3 on top of earlier major release versions. 

      PokerTracker recommends that you install to the default location unless you have a dedicated alternate solutions such as a Solid State Drive (SSD) for your database. Click Next  to continue.

    • Data Directory

      If this is a new PostgreSQL installation you will be prompted to select the data directory. Click Next to continue, DO NOT change this default directory location, it is a sub-directory of the installation directory that you selected in the previous step.

      If you are upgrading to the the latest PostgreSQL point release update, the installer will not prompt you for the data directory. 

    • Password

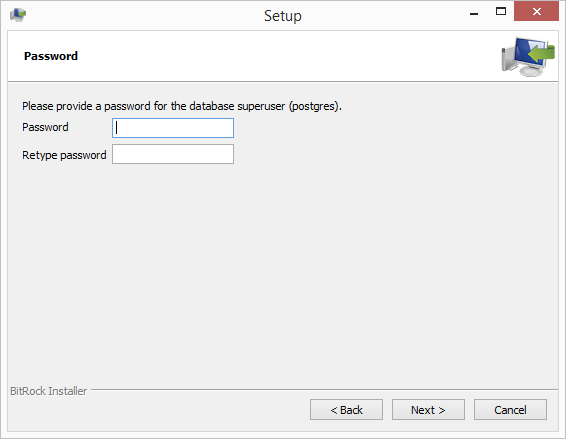
      In the next screen you need to create the PostgreSQL database password for the "postgres" service account.

      We advise using the default password 'dbpass', but you may chose to use any password you wish to use.  It is safe to use the PostgreSQL default password because the database server is configured to be only accessable from the local computer.  In the event you forget your chosen password you will need to uninstall PostgreSQL and delete the Service Account, that is why we advise using the default password 'dbpass". 

      postgreSQL password

    • Port
      The next screen named allows you to change the default Port that PostgreSQL will use to communicate over TCP/IP networking protocols. The default port is 5432. If you are installing a new instance of PostgreSQL then the Port will default to the next accessible Port number in progressive order, such as 5433.  
       
      Do not change the Port value unless if you are an advanced user and know exactly what you are doing.  Click Next to continue.
    • Advanced Options
      Leave the default Advanced Options selected. Click Next to continue.
    • Ready to Install
      PostgreSQL is now ready to be installed. Click Next to begin the installation process.
    • Completing the PostgeSQL Setup Wizard
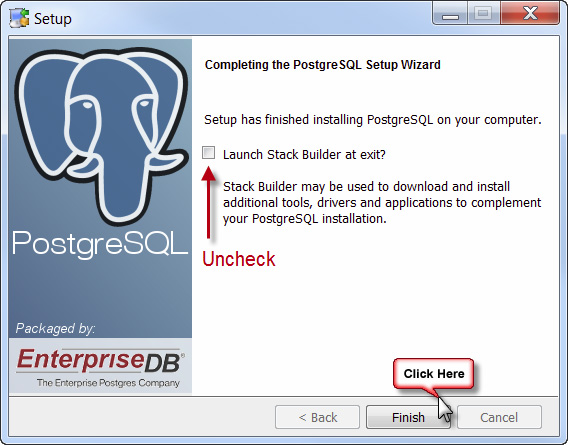
      Once PostgreSQL has completed installing the final screen will prompt you to launch the stack builder upon exit. Uncheck this option, these features are not needed for PokerTracker.  Click Finish.
      PostgreSQL Setup
       
      PostgreSQL is now sucessfully installed on your computer. 
    • Installing a New Postgres Instance

      If you convert to PostgreSQL 9.3 from an earlier version you have two conversion strategies to choose from:  

      1. Backup your existing databases, uninstall the old version of PostgreSQL, then install PostgreSQL 9.3 and restore your databases.  This is the easiest method for most users, as it will not require any changes in PokerTracker 4.  The Port used by PokerTracker 4 to communicate with the PostgreSQL server will continue to be 5432 if the default port was used during installation. 
      2. Back up your old database(s) stored in the old PostgreSQL database, then install a new PostgreSQL 9.3 instance which uses a new Port (typically this port will default to 5433).  Once PostgreSQL 9.3 is installed, you can then create a new database in PokerTracker 4 that uses the new Port (5433). Now restore the old database(s) to this newly created database that uses the new Port.  This method allows you to maintain your old database server and the new 9.3 database server at the same time.  

      *note* A second or greater instance of PostgreSQL is only possible when using different major versions.  

  • How to Uninstall PostgreSQL

    Each version of the PostgreSQL database version has its own unique issues that must be addressed when installing or uninstalling.  If you wish to uninstall PostgreSQL please review the guide for the version you wish to uninstall. 

    Before you uninstall, please read this guide carefully and remember to back up your database before you begin.  We do not advise uninstalling PostgreSQL unless you are having problems caused by the Postgres service, or if you intend to replace an old version of PostgreSQL with a newer major release without changing the ports used by the service.  

    • Uninstalling PostgreSQL 9.x

      The process for uninstalling PostgreSQL 9.x is dependent on the operating system you have installed.  When uninstallation is completed, the database will remain on your hard drive as a safety precaution that will allow you to reinstall at a later time and reclaim that data.

      Do not attempt to uninstall PostgreSQL by deleting its folder.  This method will not delete the PostgreSQL service and it may cause extensive OS problems.  The only safe and assured methods of uninstalling PostgreSQL are by using the 'Add or Remove Programs' in Windows Control Panel or the official PostgreSQL uninstaller.  

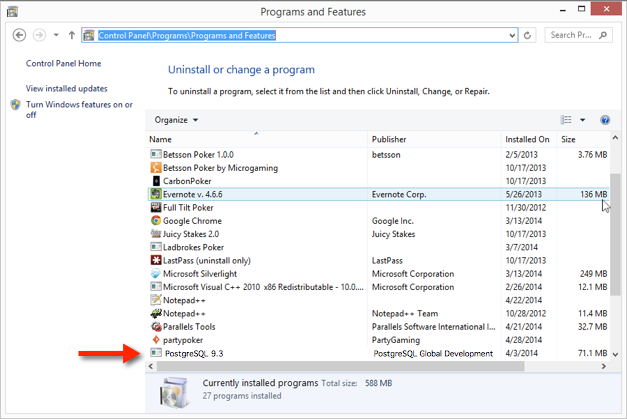
      Windows 8: In Start Menu select the Control Panel. Under the Programs heading select “Uninstall a program”. Select the PostgreSQL 9.x version you wish to remove and click Uninstall. 

      Uninstall

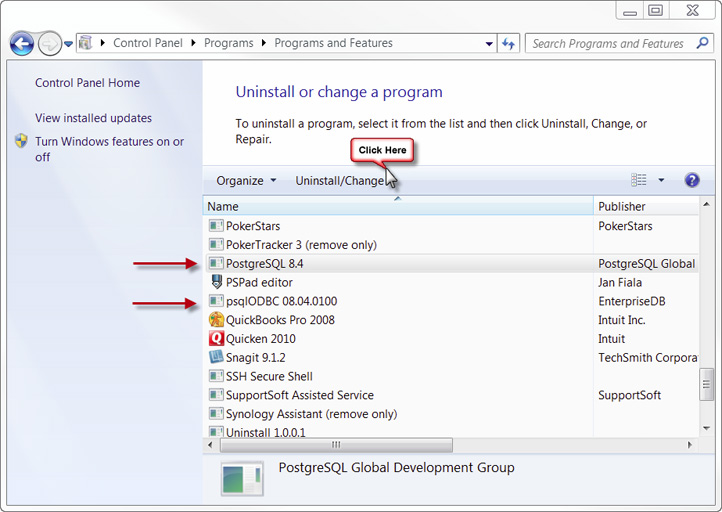
      Windows 7: In Start Menu open the Control Panel. Under the Programs heading select “Uninstall a program”. Select the PostgreSQL 9.x version you wish to remove and click Uninstall. 

      Windows Vista: In the Start Menu open the Control Panel.  If you are using the Classic View select "Programs and Features". If you are not using the Classic View, under the Programs heading select “Uninstall a program”. Select the PostgreSQL 9.x version you wish to remove and click Uninstall. 

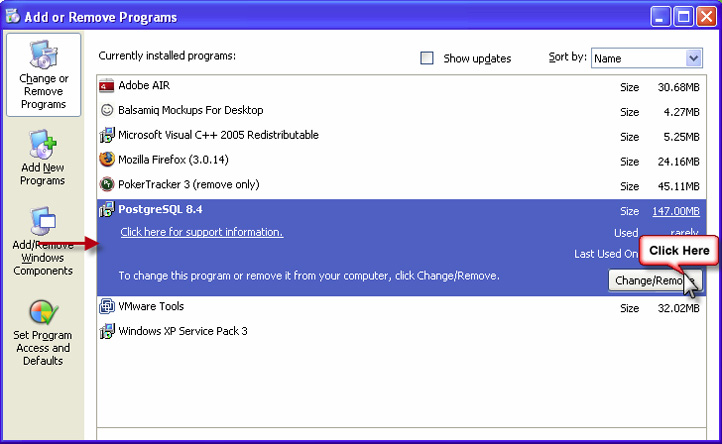
      Windows XP or 2000: In Start Menu open the Control Panel and select "Add or Remove Programs". Select the PostgreSQL 9.x version you wish to remove and click Uninstall. 


      If the program "psqlODBC" is listed, select it and uninstall as well to complete this process.

      The PostgreSQL database and Windows Service is now uninstalled, but the database remains.  If you wish to delete the database please continue with the next step. 

    • Deleting the PostgreSQL Directory

      WARNING: You should never delete your PostgreSQL directory unless you wish to start with a brand new database and you want to delete your existing database.  Once this step is performed there is no way to recover your lost database data.  

      If you wish to preserve your existing database once PostgreSQL is removed then you can skip this step. 

      Once PostgreSQL is uninstalled you may delete your PostgreSQL Directory.  In Windows Explorer open "My Computer" and browse to your C:\Program Files directory. Locate the folder named "PostgreSQL", select that folder then right-click and select Delete.  If you do not see the PostgreSQL folder, look under C:\Program Files (x86) and follow the instructions above. 

      PostgreSQL is now completely uninstalled from your computer and the database has been deleted. 

    • Deleting the PostgreSQL Service Account

      You may come across a situation where the PostgreSQL Service Account named "postgres" must be deleted before PostgreSQL can be reinstalled or upgraded. This typically occurs when the existing service account's OS permissions have become damaged, or if you encounter a permission denied message while attempting to install PostgreSQL.

      If you lost the password for the Service Account we suggest you try one of these three common default passwords.  In the event none of these passwords are correct, then PostgreSQL Service Account must be deleted and PostgreSQL can be reinstalled or upgraded :

      • dbpass

      • postgrespass

      • svcPASS83

      To delete the PostgreSQL Service account the task must be performed from the Windows Command Line.   There are two common methods you can choose to use that will allow you to open a command prompt with full administrator permissions 

      To start a command prompt as an administrator:

      1. Click Start, click All Programs, and then click Accessories.
      2. Right-click Command prompt, and then click Run as administrator.
      If the User Account Control dialog box appears, confirm that the action it displays is what you want, and then click Continue.
       
      To start a command prompt as an administrator (alternative method):
      1. Click Start.
      2. In the Start Search box, type cmd, and then press CTRL+SHIFT+ENTER.
      If the User Account Control dialog box appears, confirm that the action it displays is what you want, and then click Continue.


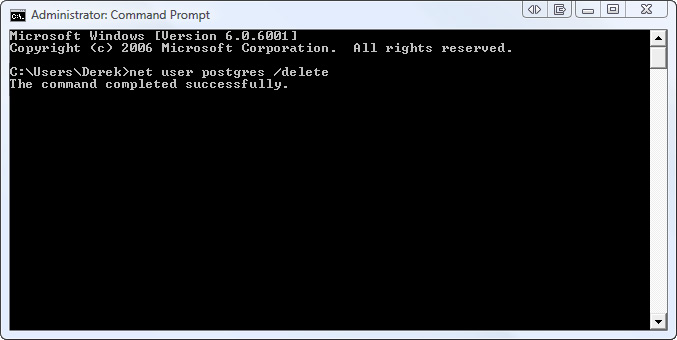
      At the command prompt type:

      net user postgres /delete

      Then hit <Enter>


      You will see a response that says "The command completed successfully." If you do not see this message then Windows failed to delete the postgres service account user due to insufficient privileges. When this occurs you must close this window and follow the instructions once again to open the Command Prompt as an administrator.  

  • Traveling Between Time Zones While Using PostgreSQL 9.3

    Prior to the release of PostgreSQL 9.2 the time zone was determined by the operating system's time zone and set each time the PostgreSQL server was started.  As of PostgreSQL 9.2 the time zone used by the SQL Server is no longer taken from the host operating system, it is now permanently defined within the configuration file.  

    During the initial install of PostgreSQL 9.2 or greater the time zone used by the operating system during installation will be configured to be the default time zone within the postgresql.conf file.  

    This new method of defining the time zone has great benefits for the majority of PostgreSQL functions, the server is typically used within stationary computers associated with a fixed IP address.  But the needs of PokerTracker 4 users are very different, poker players may use a laptop instead of a stationary computer and their IP address may frequently change.  

    In the event you travel between time zones, you may discover that hand histories that you have played will be imported with a time offset. This time offset will affect all reports and filters, to temporarily correct this inconvenient time zone issue you will have to alter the timezone operator in the postgresql.conf file to match the current time zone and then restart the PostgreSQL Server.  

    • Alter the Time Zone in postgresql.conf

      You can define the time zone used by PostgreSQL 9.2 or greater by editing the postgresql.conf file.  


      Windows (for Mac OS X differences see below)

      1. Press the 'Start' key on your keyboard and type 'notepad' to find the Notepad application. 
      2. Right click on the Notepad application icon and select Run as AdministratorIf a UAC message is displayed, do one of the following to allow Notepad to run with Administrative permissions:
        1. If you are logged on as a standard user, or if UAC is configured to always require credentials, enter the appropriate administrative credentials, and then click OK.
        2. If you are logged on as an administrator and UAC is not configured to always require credentials, click Yes to start the application.
      3. In Notepad open this file: C:\Program Files\PostgreSQL\9.3\data\postgresql.conf
        Note that by default Notepad only looks for text files so if you browse to the file you will need to change from 'Text Documents' to 'All Files' in the bottom right hand corner of the "Open" window.
        Alternatively copy & paste the path above into the "Open" window.
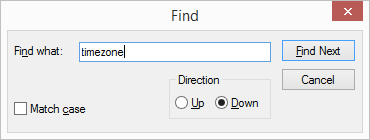
      4. Click CTRL+F and type in "timezone =". Set the Direction to Down and click Find Next.  
        Note that you need to change the "timezone = ..." line, which is not necessarily the first instance of timezone in the file so you may need to search more than once.
      5. Alter the timezone property to match your current time zone.  The list of authorized time zone properties can be found at http://en.wikipedia.org/wiki/List_of_tz_database_time_zones, under the "TZ" column.  For example if you installed PostgreSQL 9.3 while in London your timezone property will appear to be : timezone = 'Europe/London'. To change the time zone to reflect the time zone for Berlin change the time zone property to timezone = 'Europe/Berlin'
        timezone
      6. The # sign at the start of any line within the postgreql.conf file is used to comment out the property change defined by that line.  If there is a "#" as the start of the timezone line, you must delete this character.
      7. You may also wish to make the same change for the "log_timezone" entry.
      8. Save the postgresql.conf file by selecting File > Save.
      9. The PostgreSQL server must now be restarted to allow the changes made to the configuration file to take effect.  The easiest way to accomplish this is by restarting your computer.  


      Mac OS X

      On Mac OSX you can make the same change but to edit the file you need to follow these steps:

      1. Run the Terminal application found at /Applications/Utilities/Terminal.
      2. Type sudo nano /Library/PostgreSQL/9.3/data/postgresql.conf
        Type in your OS X administrator password if requested. This will start the Nano text editor inside of the Terminal window.
      3. You can search for the timezone = 'X' entry by pressing CTRL+W (as indicated at the bottom of the Terminal window) and typing "timezone =".
        Note that you need to change the "timezone = ..." line, which is not necessarily the first instance of timezone in the file so you may need to search more than once.
      4. Press CTRL+O to save the file (press 'Enter' to confirm), then CTRL+X to exit the editor.
      5. The PostgreSQL server must now be restarted to allow the changes made to the configuration file to take effect.  The easiest way to accomplish this is by restarting your computer.